Civic Commissions Board Guide
Silver Palace's bounty endgame: B, A and S rank contracts, Glory Coin and the Bounty Exchange, and the Bounty Registry loop that refreshes every hour.
Silver Palace ships three endgame modes, and the Civic Commissions Board is the third and the most open-ended of them. Hilbert's Hotel gives you a weekly ladder. Thought Experiment gives you a one-time climb. The Civic Commissions Board gives you a board of criminals that refreshes every hour, for as long as you feel like working.
This guide covers the whole loop as it ran in the Dichotomy Beta: where the board is, how the B, A and S rank contracts differ, what Glory Coin buys, and how the Bounty Registry turns a contract into four fights.
Where to find the Civic Commissions Board
The board is a world object, not a menu. You walk to it. It sits in the city with a Civic Commissions Board marker floating over it, alongside the other interaction points on the minimap, and interacting opens the board UI directly.
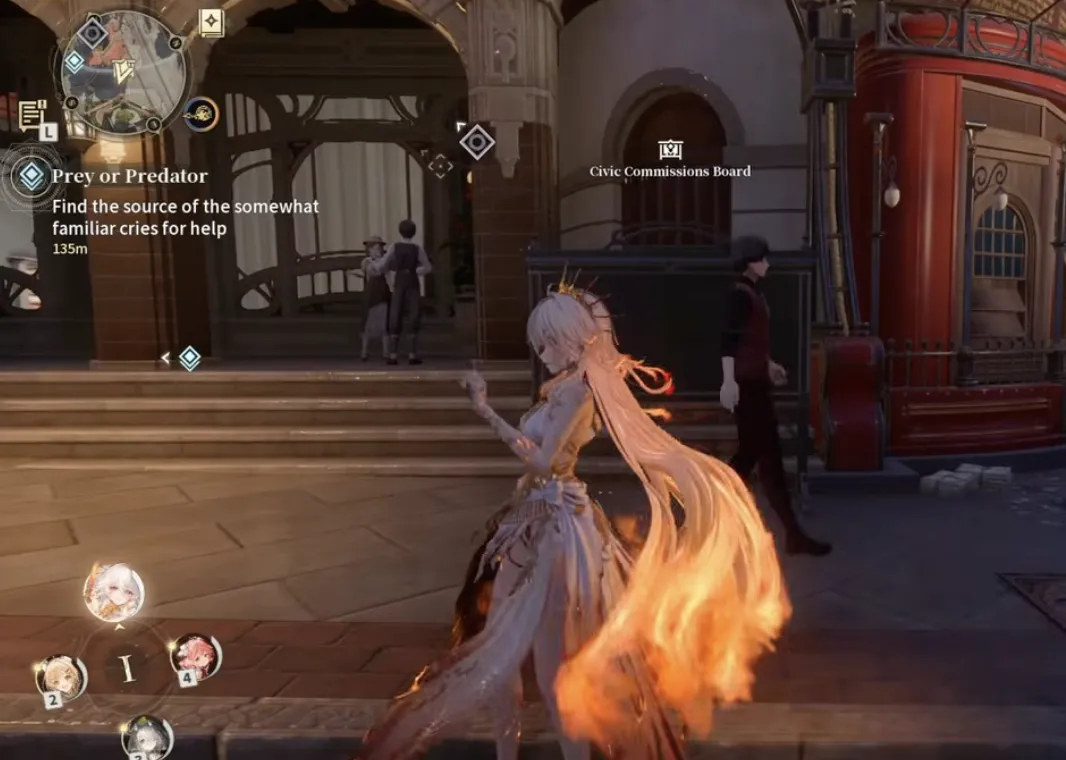
The Civic Commissions Board is a marked world interaction point, reached on foot like any other city facility. Source: official Silver Palace Dichotomy Beta footage.
Once you have taken a contract, the tracking markers appear on the world map, so you can plan a route between the three investigation sites before you set out.
Bounty ranks: B, A and S
Contracts hang on the board as pinned cards, each stamped with a large rank letter. Three ranks were live in the beta: B, A and S, in ascending order of difficulty and payout. Cards carry the target's name, or a redacted ??? when the contract is still locked. Two named targets on the board were Harmant, the Lender at A rank and the Malevolent Watcher at B rank.
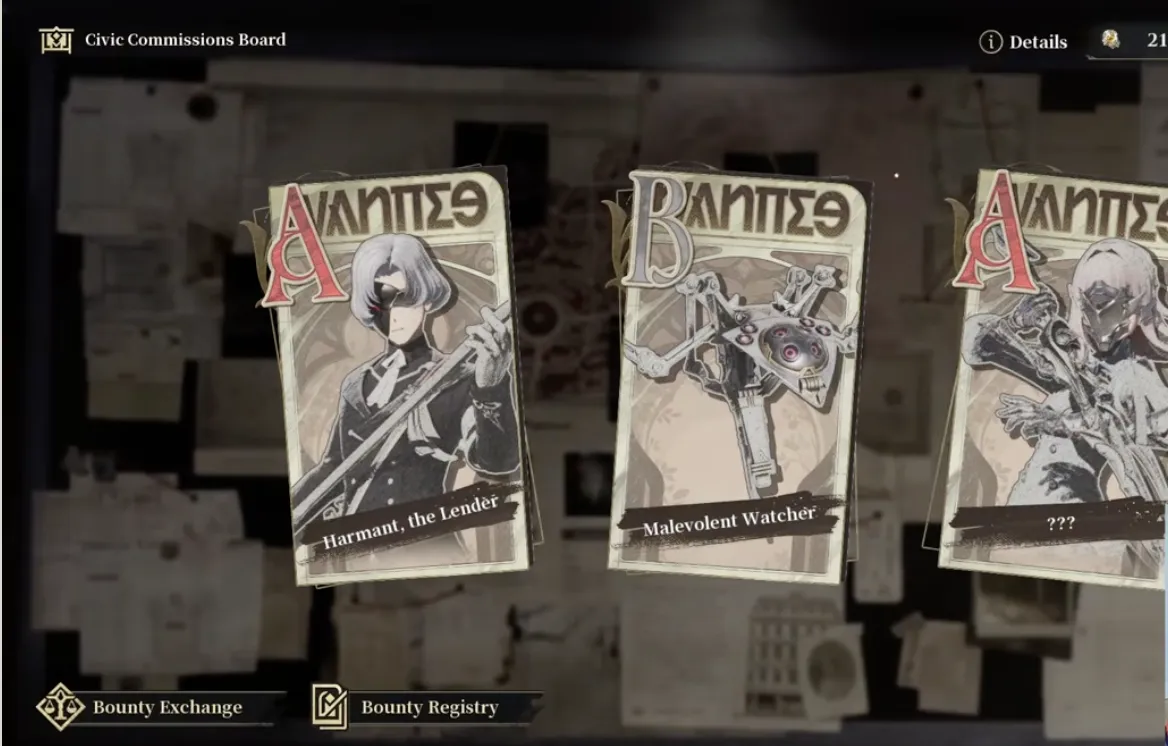
Contract cards pinned to the board, rank letter first. The Bounty Exchange and Bounty Registry are docked along the bottom edge. Source: official Silver Palace Dichotomy Beta footage.
Two more buttons live at the bottom of the board and matter as much as the cards themselves: Bounty Exchange, where Glory Coin is spent, and Bounty Registry, where an accepted contract is tracked.
The game's own word for one of these contracts is a Bounty Writ. Three achievements carry that name and count them off, asking you to complete your first writ, then ten, then twenty, and Glory Coin's item text names the Bounty Exchange verbatim. This guide keeps saying "contract" and "the Civic Commissions Board", which is what the board itself is labelled in the world, but Bounty Writ is the term you will see in an achievement or a reward line. The board is also one job family inside the wider Commissions system, which is where the other four live.
Reading a contract before you accept
Selecting a card opens the contract detail panel. It gives you three things: flavour text explaining who the target is and why the city wants them, an Enemy Preview row, and a Bounty Reward row.
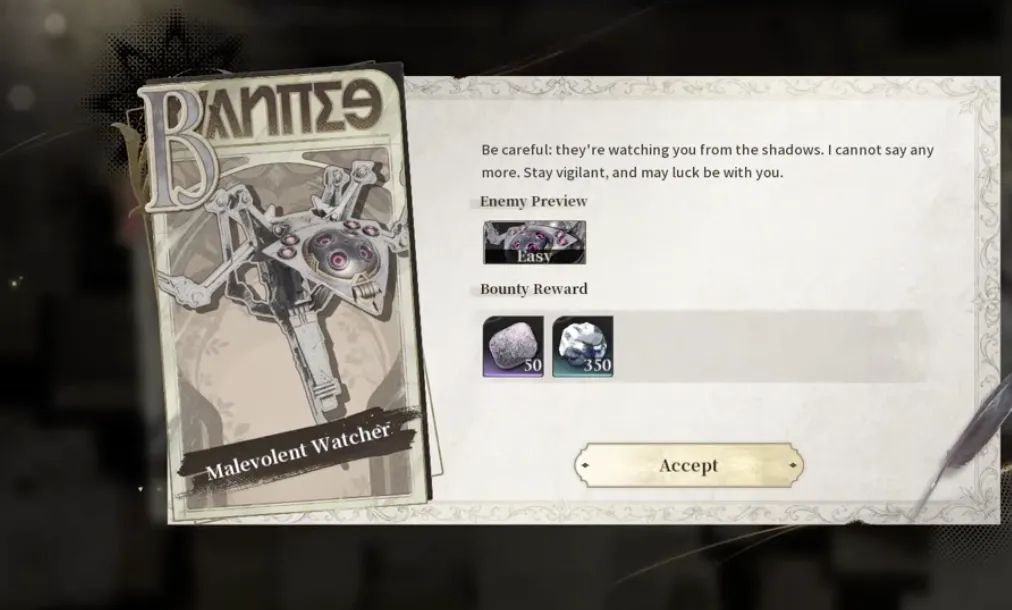
A B rank contract: one enemy at Easy, paying 50 Glory Coin and 350 Ounce. Source: official Silver Palace Dichotomy Beta footage.
The Enemy Preview row is the part worth reading carefully. Each slot is one fight you will actually have to win, and each carries its own difficulty label (Easy, Normal, and upward at higher ranks). A B rank contract showed a single slot. The A rank Harmant contract showed four: one Normal and three Easy.
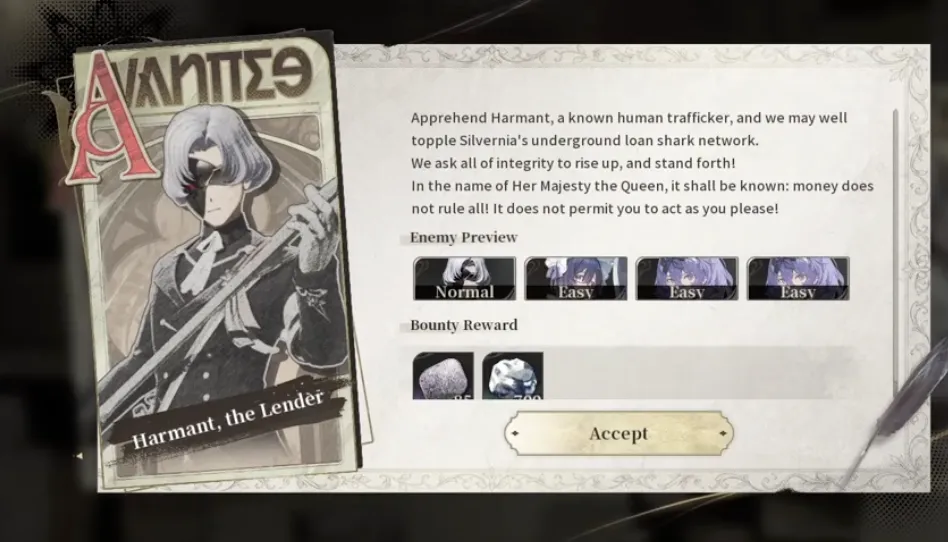
The A rank Harmant contract, asking you to apprehend a known human trafficker and topple Silvernia's underground loan shark network. Four enemy slots, and a larger payout to match. Source: official Silver Palace Dichotomy Beta footage.
Rank payouts scale roughly as you would expect:
| Rank | Enemy previews | Glory Coin | Ounce |
|---|---|---|---|
| B | 1 | 50 | 350 |
| A | 4 (1 Normal, 3 Easy) | 85 | About 700 |
| S | More, and harder | Highest on the board | Highest on the board |
Accepting is a commitment of travel time more than anything else, so pick the highest rank your team can actually clear rather than farming B contracts for volume.
Glory Coin and the Bounty Exchange
Every completed bounty pays Glory Coin. Its description is plain about what it is for: a commemorative coin earned by aiding others and completing requests, spendable on wares at the Bounty Exchange.
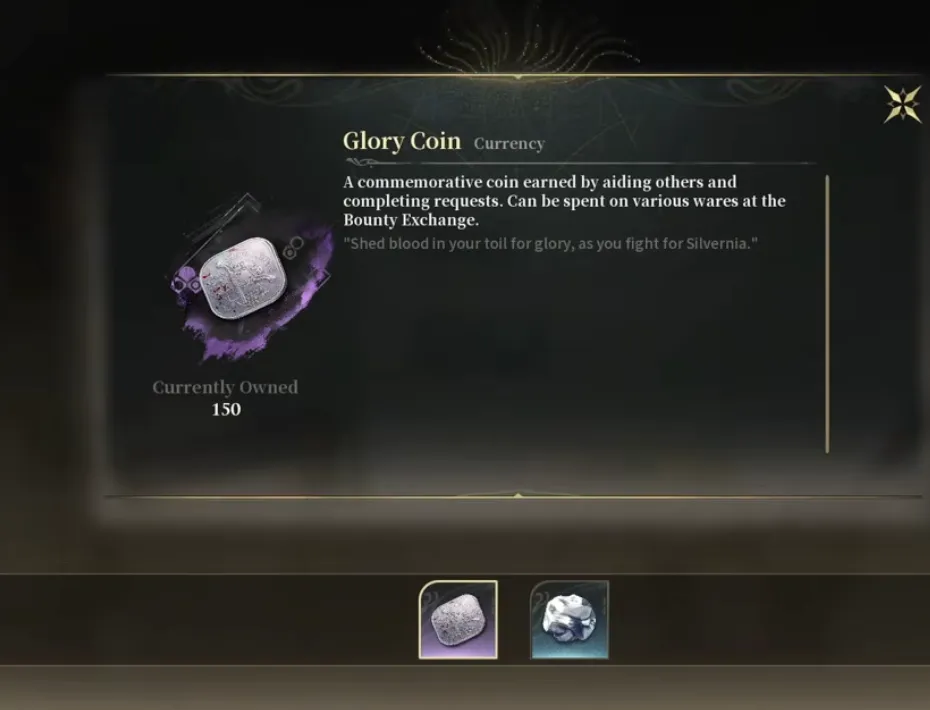
Glory Coin is a Civic Commissions currency with exactly one sink. Source: official Silver Palace Dichotomy Beta footage.
That sink is the Bounty Exchange, and it is the reason this mode matters more than its enemy count suggests.
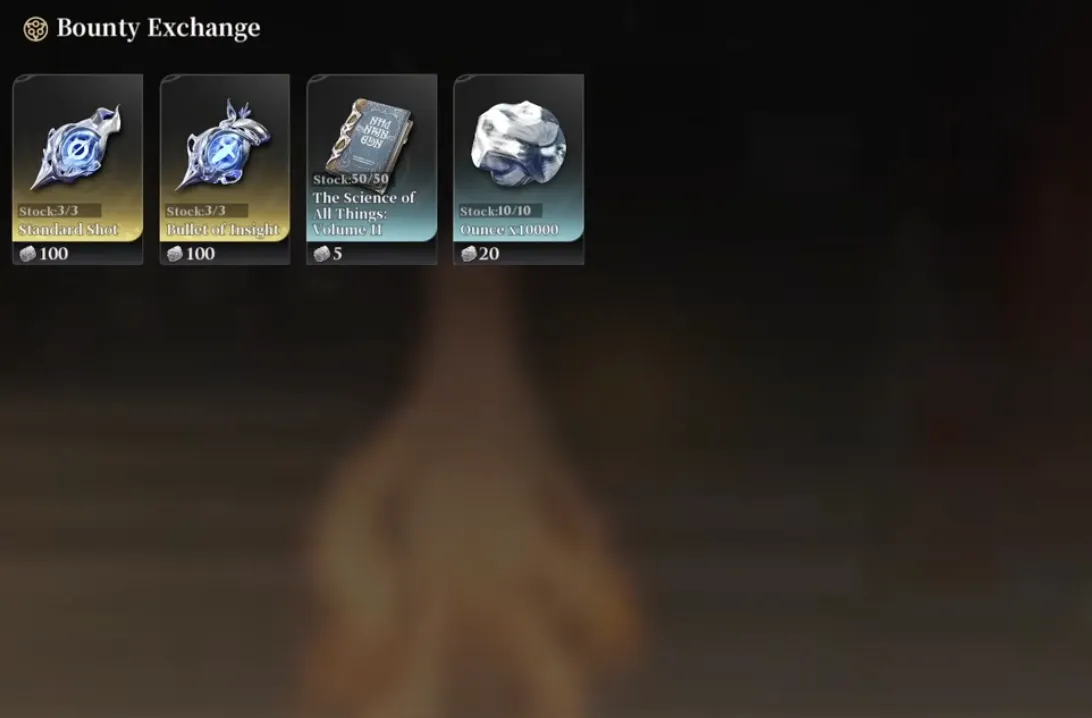
Four stock lines, two of them standard banner pulls. Stock counts sit in the corner of each card. Source: official Silver Palace Dichotomy Beta footage.
| Item | Cost | Stock per cycle |
|---|---|---|
| Standard Shot | 100 Glory Coin | 3 |
| Bullet of Insight | 100 Glory Coin | 3 |
| The Science of All Things: Volume II | 5 Glory Coin | 50 |
| Ounce x40000 | 20 Glory Coin | 10 |
Standard Shot and Bullet of Insight are the standard weapon banner and standard character banner pulls. Six of them, three each, sit behind 600 Glory Coin. At 85 Glory Coin for an A rank contract, that is roughly seven bounties to clear the pull stock, which is a genuinely fast free-pull loop for a mode with no daily gate on it. The Ounce line is the volume sink once your pull stock is cleared, and the upgrade book is cheap enough to buy out on sight.
Running a bounty: the Bounty Registry
Accepting a contract does not start a fight. It starts an investigation, and the Bounty Registry is where you follow it.
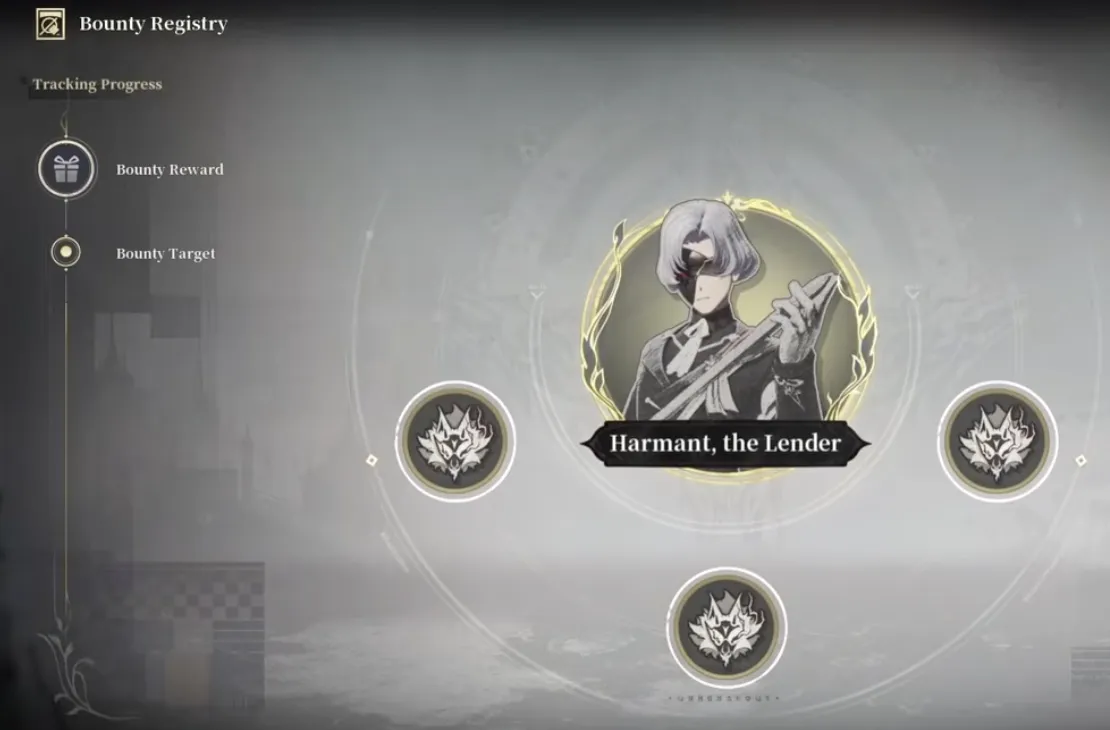
The Bounty Registry: Tracking Progress on the left, the target ringed by three investigation nodes. Source: official Silver Palace Dichotomy Beta footage.
The layout reads left to right. The Tracking Progress rail lists Bounty Reward and Bounty Target. The main panel shows the target portrait with three nodes around it. Each node is a separate fight at a separate location in the city, and each one is a named servant of the target rather than a generic mob.
That naming is not decorative. Each node carries a Bonus Effect for clearing it. Harmant Servant 1 is described as an elite bodyguard whose large skirt hems conceal a multitude of purpose-built shields, and who reportedly keeps Harmant's loan ledger on her person. Her node reads: "Prevents Harmant Servant 1 from supporting the tracked target upon completing the tracking checkpoint."
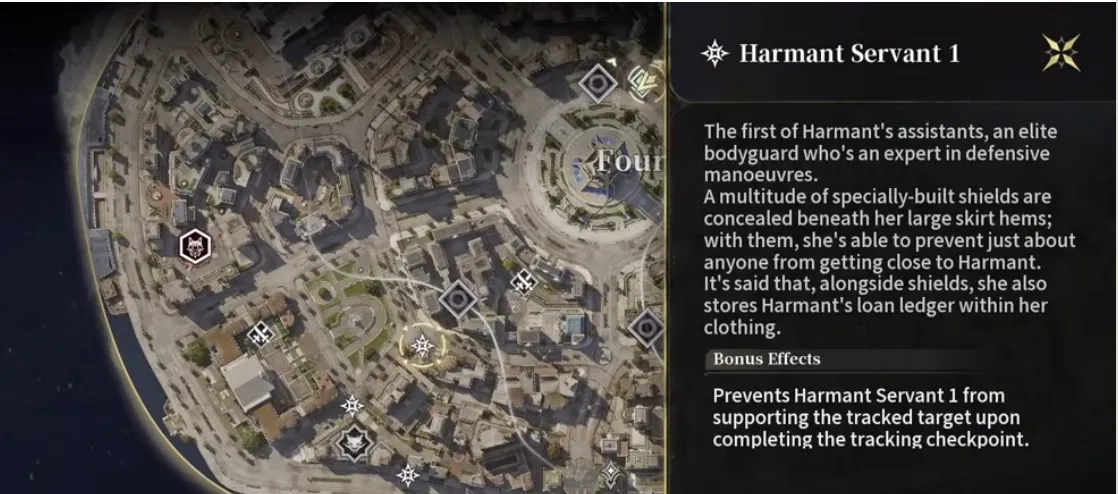
Tracking markers on the city map, with the servant detail panel spelling out the bonus effect for clearing that checkpoint. Source: official Silver Palace Dichotomy Beta footage.
In other words, the three investigations are not a gate you tolerate before the real fight. They are the real fight's difficulty dial. Clear all three and the target stands alone. Skip nothing.
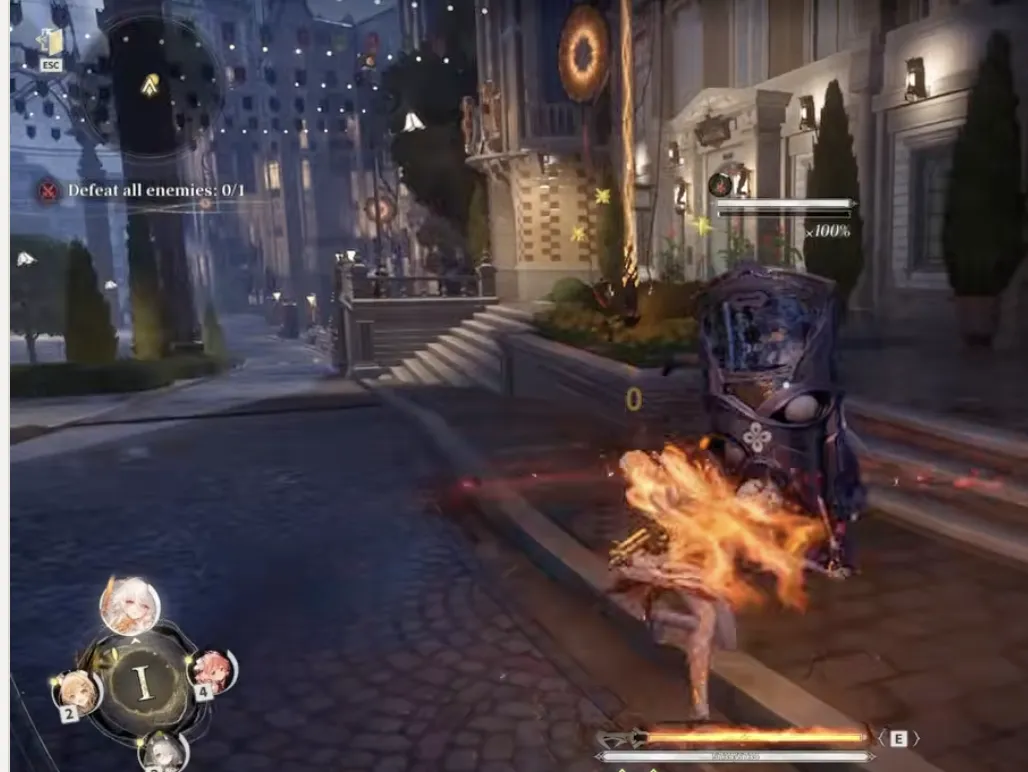
The first investigation site, with a straightforward "Defeat all enemies" objective. Enemy types vary widely between bounties: werewolves, vampires, harpies and shield bruisers all showed up across contracts. Source: official Silver Palace Dichotomy Beta footage.
Clear a node and the Registry updates, stamping that node Complete and leaving the remaining two open.
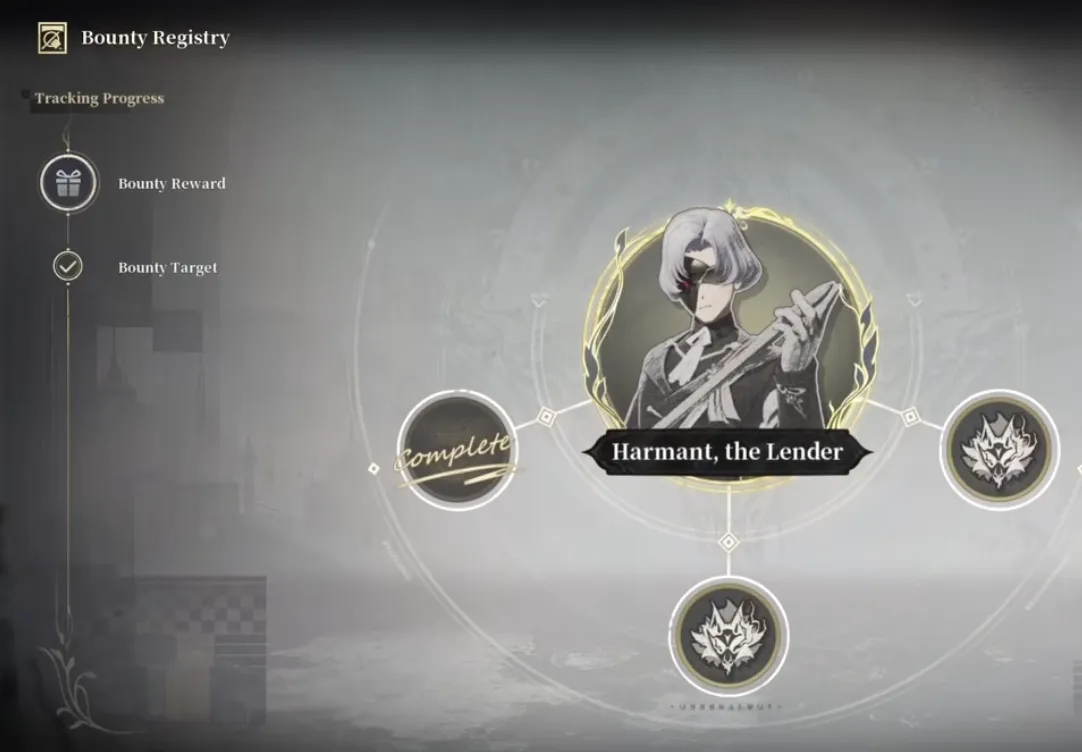
One down, two to go. The Tracking Progress rail ticks over as each checkpoint lands. Source: official Silver Palace Dichotomy Beta footage.
With all three cleared, a milestone fires to say the bounty target has been found, the track investigation prompt appears, and you head to the target for the contract fight. Win it and the Bounty Reward pays out.
Farming the hourly refresh
The board refreshes every hour. Testers found no cap on refreshes during the beta, which means the practical loop is:
- Take the highest rank contract your team clears comfortably.
- Open the map, plot the three investigation markers, and run them in the shortest loop rather than in listed order.
- Kill the target, collect Glory Coin and Ounce.
- Return to the board, or wait out the refresh and take a fresh contract.
- Spend at the Bounty Exchange, pull stock first, then Ounce.
The efficiency lever here is travel, not combat. The fights themselves are short at B and A rank against a levelled team; the time cost is crossing the city three times. Route planning off the map before you leave the board is worth more than any team optimisation.
How it compares to the other endgame modes
| Civic Commissions Board | Hilbert's Hotel | Thought Experiment | |
|---|---|---|---|
| Reset | Hourly | Weekly | One-time climb |
| Structure | Contract, 3 investigations, target | Room crawl with difficulty tiers | Tiered combat gauntlet |
| Currency | Glory Coin | Membership Stamp, Merit | Mode rewards |
| Headline reward | Standard banner pulls | Reactor Crystals via Merit ladder | Clear rewards |
| Repeatable | Effectively unlimited | Once per week | No |
The three complement each other rather than compete. Hilbert's Hotel is your crystal income, Thought Experiment is your difficulty check, and the Civic Commissions Board is the one you come back to when the other two are on cooldown.
Its ceiling is also the highest of the three. The current loop is "defeat three enemies to reach a fourth", and the systems around it, named servants, bonus effects, ledgers hidden in clothing, are all pointing at something more investigative. Tracking a target through buildings, or solving a bounty by means other than combat, would fit the framing that is already in the game. For now, it is the cleanest repeatable reward loop Silver Palace has.
Civic Commissions Board FAQ
What is the Civic Commissions Board in Silver Palace?
The Civic Commissions Board is Silver Palace’s bounty board and the third of its three endgame modes. It is a physical interaction point in the city that offers a rotating set of ranked bounty contracts. You accept a contract, track the target through the Bounty Registry, clear three investigation checkpoints, then fight the named target for Glory Coin and Ounce.
What bounty ranks does the Civic Commissions Board have?
Three ranks appeared on the board during the Dichotomy Beta: B, A and S, printed as large letters on each contract card. B is the entry tier, A sits in the middle, and S is the hardest and highest paying. The rank sets both the payout and how many enemies stand between you and the target: a B rank bounty showed a single enemy in its preview, while an A rank showed four.
What is a Bounty Writ in Silver Palace?
A Bounty Writ is one bounty contract from the Civic Commissions Board. The name comes from the game’s own achievements, which ask you to complete your first Bounty Writ, then ten, then twenty. The board is one family inside the wider Commissions system, which also covers City Errands, Private Requests, Curious Cases and Major Cases.
What is Glory Coin used for?
Glory Coin is the Civic Commissions currency. The in-game description reads "A commemorative coin earned by aiding others and completing requests. Can be spent on various wares at the Bounty Exchange." It is the only thing bounty completions pay besides Ounce, and the Bounty Exchange is the only place to spend it.
What can you buy at the Bounty Exchange?
Four stock lines were available: Standard Shot at 100 Glory Coin (stock 3), Bullet of Insight at 100 Glory Coin (stock 3), The Science of All Things: Volume II at 5 Glory Coin (stock 50), and Ounce x40000 at 20 Glory Coin (stock 10). Standard Shot and Bullet of Insight are the standard weapon and standard character banner pulls, which makes the board a repeatable source of free gacha currency.
How often do Civic Commissions bounties refresh?
Every hour. The board rerolls its available contracts on an hourly cycle, and testers found no cap on how many bounties you could take across a day during the beta. That hourly reset, rather than a daily or weekly one, is what separates this mode from Hilbert’s Hotel.
What is the Bounty Registry?
The Bounty Registry is the tracking screen for an accepted contract. A Tracking Progress rail on the left lists Bounty Reward and Bounty Target, and the main panel shows the target portrait ringed by three investigation nodes. Each node is a separate fight somewhere in the city. Clear all three and the ring resolves, the milestone reads that the bounty target has been found, and the target fight unlocks.
Do you have to clear all three investigations before the boss?
Yes, and there is a reason beyond gating. The investigation targets are the bounty target’s named servants, and each node lists a Bonus Effect for clearing it. Harmant Servant 1, an elite bodyguard with shields concealed under her skirts, carried "Prevents Harmant Servant 1 from supporting the tracked target upon completing the tracking checkpoint." Skipping a checkpoint is not an option, and clearing them is what strips the final fight of its reinforcements.
How does the Civic Commissions Board compare to the other endgame modes?
Hilbert’s Hotel is a weekly Merit ladder you sweep once a week. Thought Experiment is a story-gated gauntlet you climb once. The Civic Commissions Board is the only endgame mode on an hourly loop, so it is the one you can farm as long as you keep playing, and the only one paying standard banner pulls directly.