Boss Guide
头目战攻略
Every confirmed Silver Palace boss and how to beat it: the parry and Execute loop, telegraph reads, team building, and arena-by-arena tactics.
Silver Palace boss fights reward patience over aggression. Instead of trading blows, you read each telegraph, punish the openings, and grind down the boss Stun gauge until an Execute window opens. This guide covers the universal combat loop that beats every boss, then walks through each named boss revealed in the Monotype and Dichotomy betas with what testers confirmed and what is still unknown.
Because the game is still in pre-launch testing, exact movesets, hit values, and phase counts can shift before release. The names and arenas below are confirmed from in-game boss banners and reveal footage. Where a boss's full kit has not been shown, this guide flags it rather than inventing numbers.
Quick Answer
To beat a Silver Palace boss, watch the ring that flashes before each heavy attack. A yellow circle is parryable: tap Guard on the right mouse button the moment it lands to deflect the hit and fill the boss Stun gauge. A red circle is unblockable: dodge with Shift instead. Stack clean parries until the Stun gauge empties and the boss drops into a groggy state, then unload during the Execute window for massive damage and a party-wide damage buff. Bring one mono-attribute team with a Survival & Healing character, and swap characters often to trigger Tactical Assaults. If the timing feels too tight, Casual Mode adds Time Dilation and hit warnings.
The Universal Boss Loop
Every boss in Silver Palace bends to the same core rhythm:
Parry, Stun, Execute, Silverdrip, Reactor Energy, Tactical Assault, repeat.
- Parry the yellow telegraphs. Guard and parry share the right mouse button, and parry is a timed tap, not a hold. Reading the wind-up animation and tapping just before impact deflects the hit, prevents damage, and adds to the boss Stun gauge. A Perfect Parry lands a frame-perfect deflect for extra Stun and a clean counter window.
- Dodge the red telegraphs. Unblockable attacks, grabs, and wide area sweeps flash red. Dodge on Shift to avoid them. Dodge shares a stamina bar with sprinting and heavy attacks, so an empty bar leaves you unable to roll until it recovers. A Perfect Dodge briefly slows time for a free counter.
- Break the Stun gauge. Consistent parries and skill hits fill the gauge. When it empties, the boss staggers into a groggy state.
- Execute. The groggy window is your payoff. An Execute deals heavy burst damage, grants a party-wide damage boost, and charges Silverdrip.
- Silverdrip, Reactor Energy, and Tactical Assault. Executions and parries charge Silverdrip, which accelerates your Reactor Energy gain. Swapping characters once Reactor Energy has at least one bar spends it on a Tactical Assault that triggers the incoming character's Catalyst effect, whether that is buffs, healing, shields, or Reactor Attribute damage.
For the full breakdown of these systems, read the Combat Mastery guide and the Reactor Energy and Tactical Assault guide.
Reading Boss Telegraphs
Boss encounters chain parryable and unblockable patterns in quick succession, forcing an either-or choice on every beat. The safest habit is to prioritize parrying: each successful parry fills the Stun gauge faster, which brings the Execute window closer and shortens the fight. Save your dodge for the red-marked attacks you genuinely cannot deflect.
Higher-difficulty versions of a boss, such as those in the Thought Experiment endgame gauntlet, modify wind-ups and add new patterns. A parry timing that worked in the story may fail at higher tiers because the animation changed, so treat each harder version as a fresh read.
Team Building for Bosses
The fastest way to feel stronger against bosses is not more raw attack. It is coverage. New players tend to overinvest in one carry and forget sustain. Three principles hold up:
- Run a Survival & Healing character. Long boss fights punish squads with no sustain. A healer keeps the run alive across drawn-out phases.
- Build one mono-attribute team first. Concentrating your investment on a single Reactor Attribute unlocks the Motive and Implement set bonuses that only pay out to teammates sharing it. See the Resonance System guide and the Combat Styles & Identities guide.
- Gear the whole squad. Because every swap fires a Tactical Assault, each character needs a decent Catalyst loadout to contribute, not just your main damage dealer.
Confirmed Bosses
The bosses below have appeared with named banners in Silver Palace beta footage and trailers. Each entry lists what is confirmed and what is still to be revealed.
Rex, the Superintendent
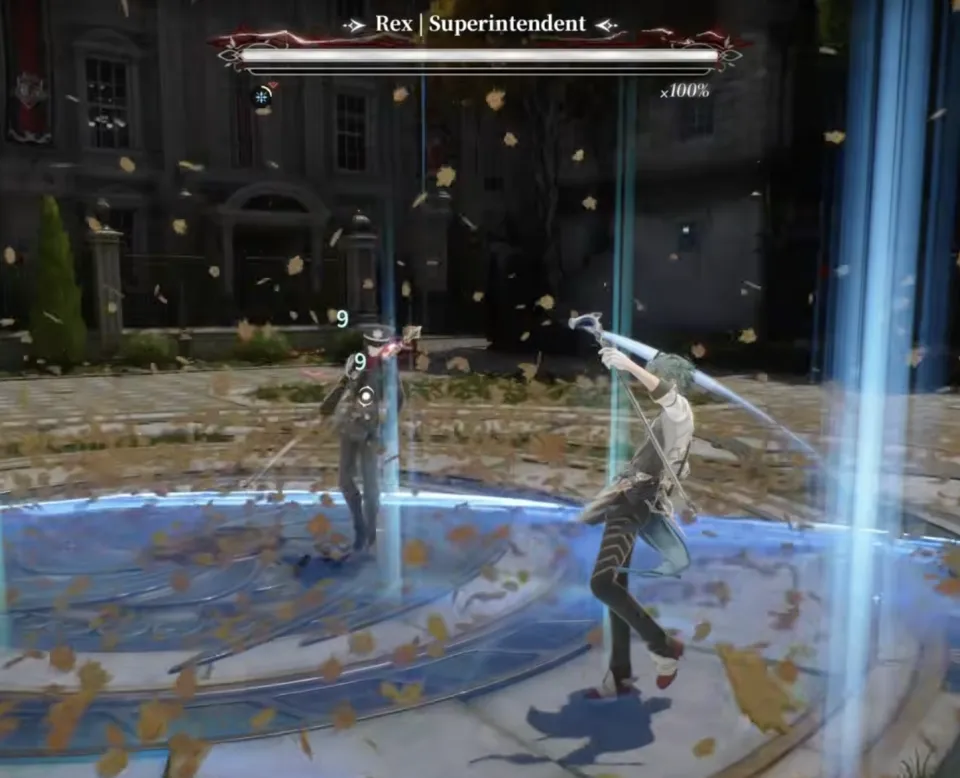
Rex is the Navy superintendent sent to oversee the river constabulary during the city's werewolf and gang crisis. In the story he clashes with the detective repeatedly before their rivalry boils over into a duel, which is where the boss banner "Rex | Superintendent" appears. The fight shown takes place one-on-one in an open courtyard littered with drifting leaves. His moveset details are not yet confirmed, but treat him as a disciplined, patient duelist: watch for parry-bait feints and keep your dodge ready for his committed lunges.
Miss Maid

Miss Maid is a servant figure who fights with an oversized rifle. In the story the maids describe their creed simply: "as Miss Maids, we have but one duty, to obey." Expect a ranged threat that pressures you at distance, which means closing the gap during her recovery frames and punishing between volleys. Her exact firing patterns and any melee follow-ups are unconfirmed.
Savage Enforcer
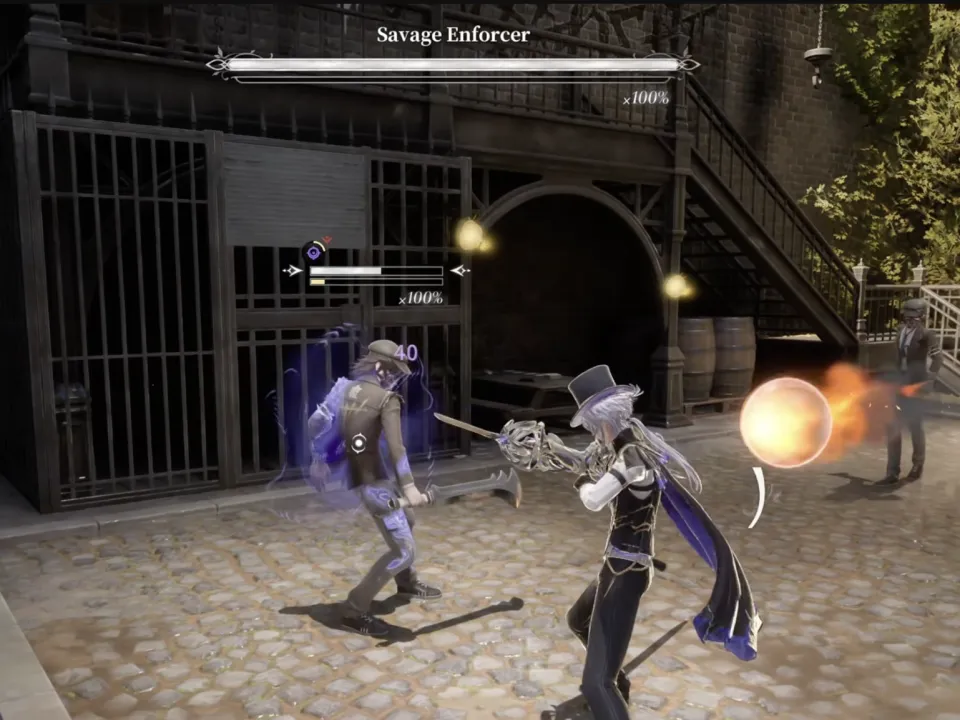
The Savage Enforcer is a street-level bruiser encountered in the city's back alleys and dockside districts. The fight shown is a close-quarters brawl against a knife-wielding attacker wreathed in dark energy. Aggressive, fast attackers like this reward tight parries: bait the swing, deflect, and build Stun quickly. His full combo strings are not yet documented.
Academic Rebels "The Unruly Trio"
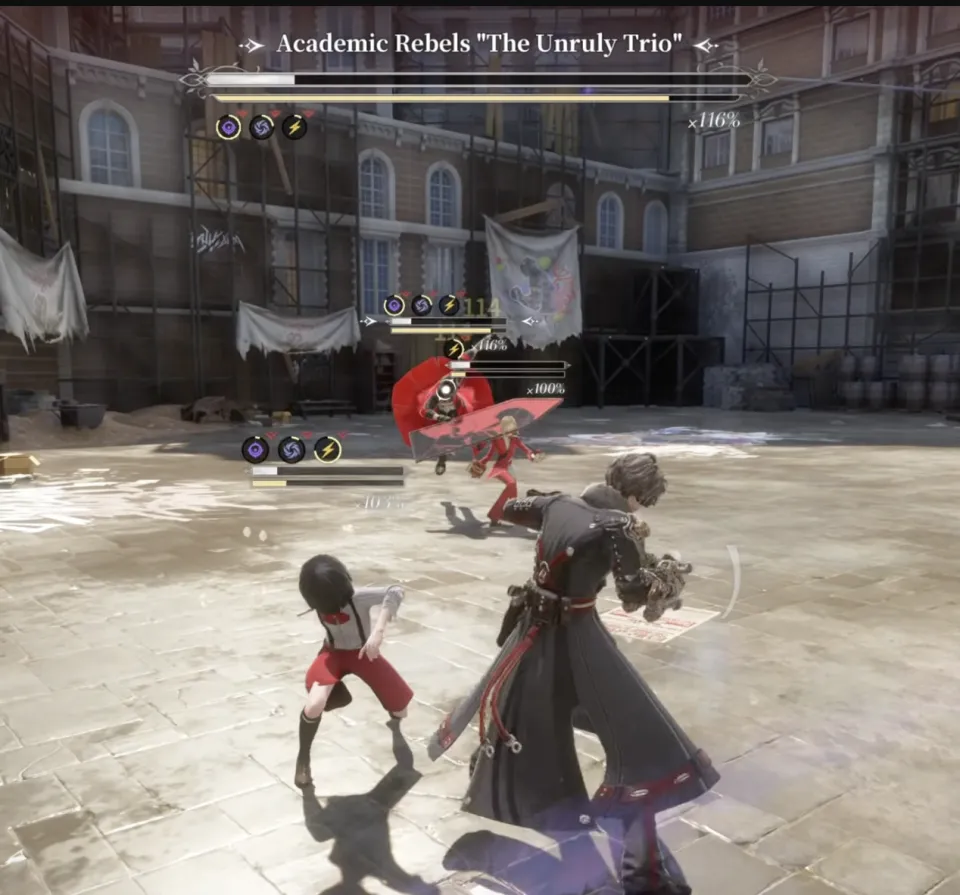
This is a three-on-one encounter against Alex, Bobo, and Caesar, the young gang members who idolize the missing Lord Silverfist. The banner reads Academic Rebels "The Unruly Trio", and the arena is a rebel-tagged courtyard hung with banners. Each rebel shows an individual health bar under a shared boss bar, so the fight is about crowd control: avoid getting surrounded, break line of sight when two of them close in, and focus one target at a time while dodging the others. Their coordinated patterns are the main threat rather than any single heavy hit.
Manager and Supervisor
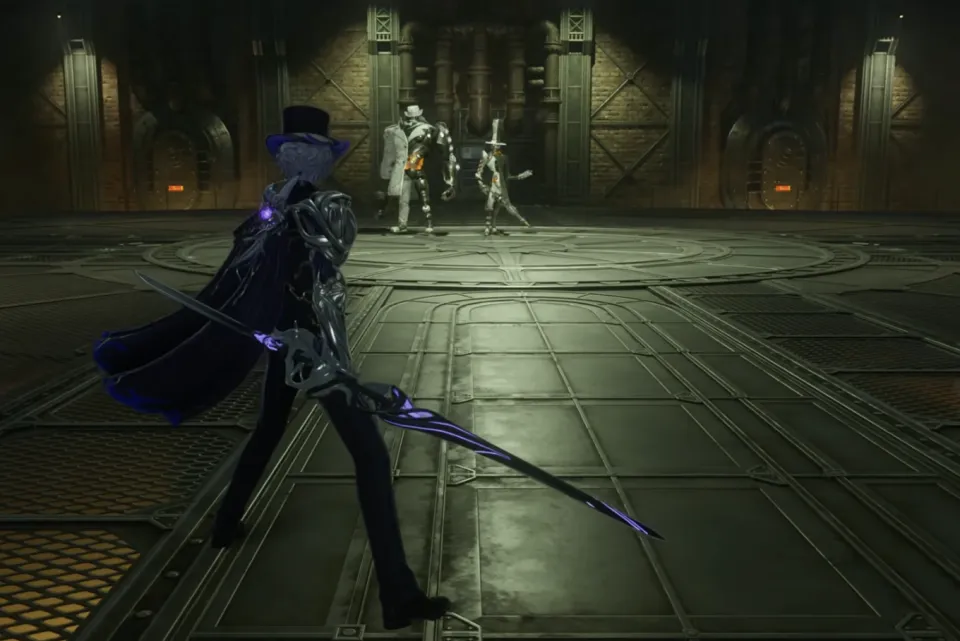
The Manager and Supervisor are a paired boss fought in an industrial, machinery-lined hall. As a two-target encounter, the danger is being caught in a pincer while their attacks overlap. Position so you can see both, and use the openings created when one commits to a heavy attack to punish the other. Their individual kits and any enrage behavior are unconfirmed.
Medallion Knight
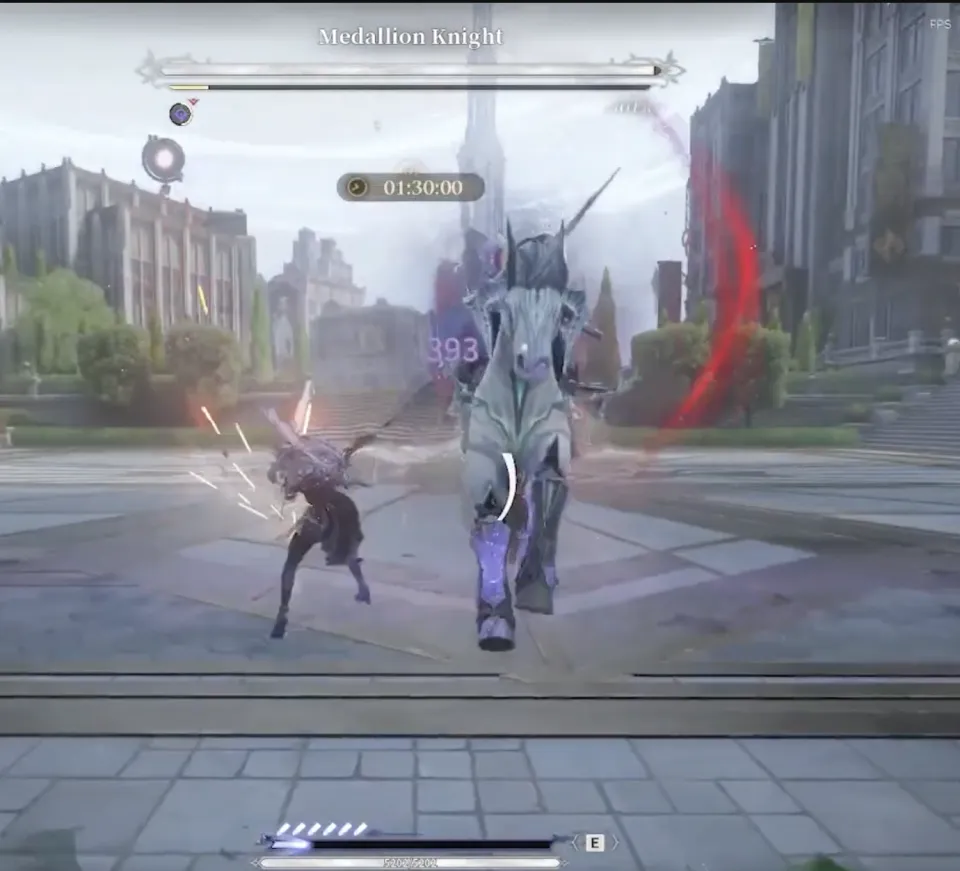
The Medallion Knight is a large, mounted boss encountered in an open plaza. The footage shows a clear timer of 01:30:00 and a high health pool in the thousands, which points to a timed, high-durability encounter rather than a quick kill. For a check like this, sustained damage matters: keep the Stun-Execute loop rolling, avoid greedy attacks that leave you exposed to its charges, and prioritize uptime over flashy single hits so you beat the clock.
Vita et Mors

Vita et Mors, Latin for "Life and Death", is a paired, ethereal boss. The two figures share a single boss bar, so both act as one threat and there is no splitting focus between them.
In the Dichotomy beta this is the prologue boss, fought on the airship, with the Detective intervening in a clash between Vita and Mors. That placement makes it the game's teaching fight rather than an endgame wall: it is built to showcase telegraph readability, which means the yellow and red cues are unusually clean and it is the best encounter in the build for drilling the parry-to-Stun-to-Execute loop before the difficulty ramps.
Treat it as a tutorial with a health bar. Read the telegraphs, parry the yellows to build Stun, dodge the reds, and take the Execute window when it opens.
Frequently Asked Questions
How many bosses does Silver Palace have?
The exact final count is not confirmed while the game is in closed beta. Beta footage and trailers have shown Rex the Superintendent, Miss Maid, the Savage Enforcer, the Academic Rebels "The Unruly Trio", the Manager and Supervisor pair, the Medallion Knight, and the paired Vita et Mors. More are expected at launch.
What is the best way to beat a boss in Silver Palace?
Read the telegraph. Yellow means parryable, so tap Guard to build the Stun gauge. Red means unblockable, so dodge. Fill the Stun gauge with clean parries, trigger the groggy state, and use the Execute window for heavy damage while the boss is open.
Can you parry every boss attack?
No. Boss patterns mix parryable yellow attacks with unblockable red ones to force either-or choices. Grabs, wide sweeps, and red-marked strikes must be dodged.
What team should I bring to a boss fight?
A balanced squad with a damage dealer, a Survival & Healing character, and a durable or controlling character. Build one mono-attribute team to max Resonance, and keep every character geared so their Tactical Assaults contribute.
Is there an easier mode for boss fights?
Yes. Casual Mode adds Time Dilation and hit warnings and favors click combos over frame-perfect parries, keeping boss fights accessible.
Once you have the loop down, take it into the Thought Experiment endgame gauntlet, and read the Boss Story and Lore guide to learn who these bosses are and why you fight them.
Stuck on a boss with someone? Send them the fight.
