
Reactor Energy & Tactical Assault
反应能量与战术突袭系统
Reactor Energy is the resource that powers your most impactful combat moments (Tactical Assaults, Catalyst triggers, and party-wide buffs) and Silverdrip is what boosts how fast it fills. Mastering this system separates casual players from optimized ones.
Reactor Energy is the resource that powers your most impactful combat moments in Silver Palace. Tactical Assaults, Catalyst triggers, and party-wide buffs all run on it, and Silverdrip is the booster that fills it faster. If you have spent any time with the game's swap-driven combat, you have seen the Roman-numeral counter ringing your Reactor climb and drain without quite knowing why. This guide explains exactly what it is, how Silverdrip speeds it up, and how to spend it for the most damage.
Mastering this system is what separates casual players from optimized ones. The mechanics themselves are simple to describe but reward careful timing: build Reactor Energy on one character, swap to a teammate to launch a Tactical Assault, let their Catalyst do its work, and rotate through your whole team rather than leaning on a single carry. It is the connective tissue between everything else you do in a fight.
Everything below reflects Dichotomy beta footage and testing on top of earlier beta coverage, so where the live game might still shift, the wording stays close to what has actually been observed. If you are still learning the underlying fight flow, read this alongside our Combat Mastery guide, and lean on the Resonance System and Combat Styles & Identities guides to understand how your Reactor Attribute fits in.
Quick Answer
Reactor Energy is displayed as a Roman-numeral counter, capped at III, surrounding your Reactor between your HP and Skill bars. Attacking enemies fills it directly, and landing Executions or parrying charges Silverdrip, which boosts how quickly Reactor Energy climbs on top of that base rate. Once Reactor Energy is at least one bar full, press 2, 3, or 4 to swap characters and launch a Tactical Assault; at a full three bars you can chain three Tactical Assaults back to back before your next regular attack. Every Tactical Assault also fires the incoming character's equipped Catalyst, which can deal Reactor Attribute damage, apply buffs, bolster shields, or provide healing.
In practice the whole system is a loop: deal damage to fill Reactor Energy, land Executions and parries to charge Silverdrip and speed that fill up, swap to launch a Tactical Assault, let the Catalyst activate, then repeat. The skill is in managing your swaps so you always have Reactor Energy available when you need it and never leave it sitting at max.
The Reactor Gauge and Reactor Energy are two things
The system has two layers and they are easy to run together. The Reactor Gauge is the meter that fills. The Reactor Energy is what the meter pays out.
- Attacking enemies fills the Reactor Gauge.
- Silverdrip, produced by Executions, Parries and certain character abilities, does not fill the Gauge by itself. It accelerates how fast attacking fills it.
- Each time the Gauge fills, you gain one Reactor Energy, and you can hold up to three.
- Swapping to a character while you hold at least one spends it and fires that character's Tactical Assault.
The practical consequence is that Silverdrip is a multiplier on aggression, not a currency you spend. Parrying and executing does not hand you a Tactical Assault; it shortens the distance to the next one.
What is Reactor Energy?
Reactor Energy is the fuel behind your strongest attacks, and the gauge itself is easy to spot once you know where to look. It shows up as a Roman-numeral counter (I, II, III) surrounding your Reactor, situated between your HP bar and Skill bar. Each bar you hold is one Tactical Assault you can spend, so the more Reactor Energy you have banked, the more Tactical Assaults you can chain in a row before your next real attack.
Reactor Energy fills from attacking enemies in general, which is its base source. The Dichotomy beta tutorial spells this out directly on-screen.
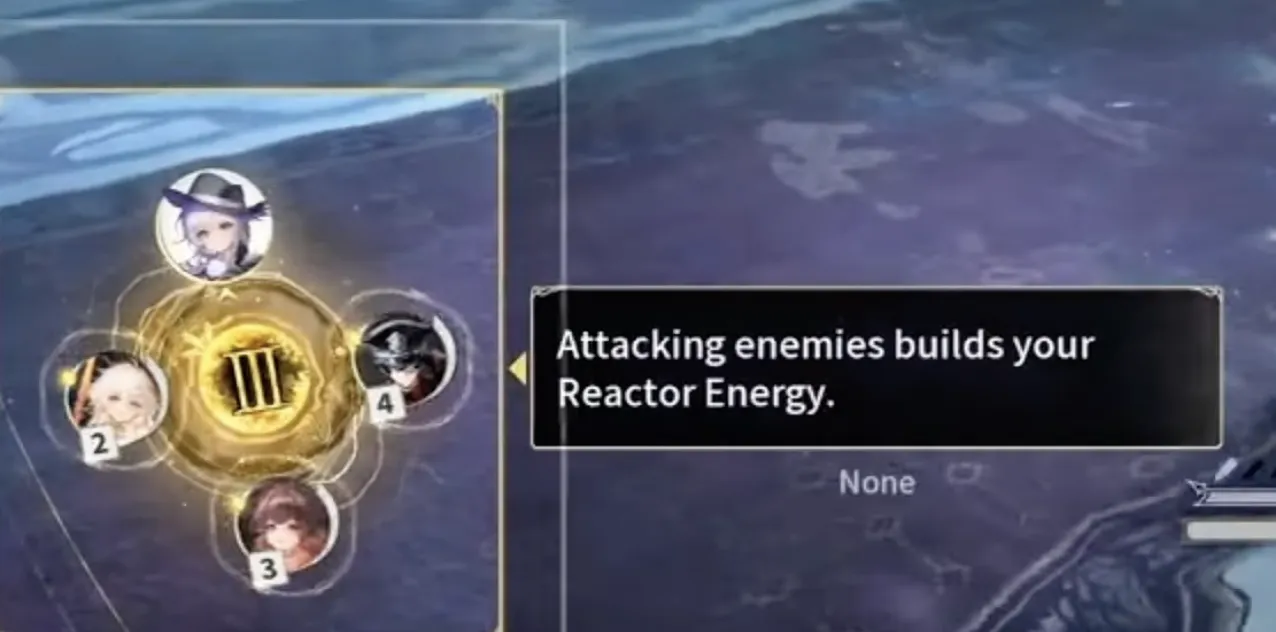
The Dichotomy beta tutorial prompt confirming Reactor Energy's base source, from official test footage.
Silverdrip is a separate, still-active mechanic layered on top: landing Executions and parrying both charge Silverdrip, and Silverdrip's job is to accelerate how quickly your Reactor Energy climbs rather than being the gauge itself. Certain character abilities also generate additional Silverdrip when they hit. Knowing that Executions and parries feed Silverdrip, and Silverdrip in turn speeds up Reactor Energy, tells you where to focus if you want to reach III faster than plain attacking alone would get you there.
The loop ties it all together: deal damage to fill Reactor Energy, land Executions and parries to charge Silverdrip and boost that fill rate, swap to launch a Tactical Assault, the Catalyst activates, deal more damage, and repeat. The key is managing your swaps so you always have Reactor Energy available when needed rather than spending it wastefully or hoarding it.
Tactical Assault System
The Tactical Assault system is what makes swapping feel powerful instead of defensive. The sequence is straightforward: once Reactor Energy is at least one bar full, you press 2, 3, or 4 to swap to that character, the incoming character performs a powerful Tactical Assault the moment they enter the field, and simultaneously their Catalyst attribute activates, dealing Reactor Attribute damage, applying buffs, or providing healing. One bar of Reactor Energy is consumed per Tactical Assault, so your banked bars directly limit how many you can chain.
Tactical Assault matters for several reasons that compound on one another. It hits hard the moment you press the swap key. It activates the incoming character's equipped Catalyst, layering an effect on top of the raw hit. Those Catalyst effects combine with Execution buffs to create massive damage windows, and because every swap pays off, the system encourages rotating between all four team members rather than relying on just one or two carries.
As one beta tester put it, the core challenge of optimized combat is "managing all the small buffs and debuffs at the same time, doing combos correctly to get ability charge efficiently, switching characters often to spend their ability charge, spending swap charges correctly." In other words, the depth is not in any single Tactical Assault but in orchestrating the whole team's swaps and timers together.
Dichotomy beta footage shows the swap prompt clearly: a circular UI with all four squad portraits arranged around the Roman-numeral Reactor Energy counter, capped at III, with a tutorial prompt confirming "Attacking enemies builds your Reactor Energy" and that once at least one bar is full, pressing 2, 3, or 4 switches characters and launches a Tactical Assault.

The Dichotomy beta tutorial prompts spell out both halves of the mechanic directly: once your Reactor Energy is at least one bar full, pressing 2, 3, or 4 switches characters and launches a Tactical Assault, and a full three bars lets you chain three of them in a row.
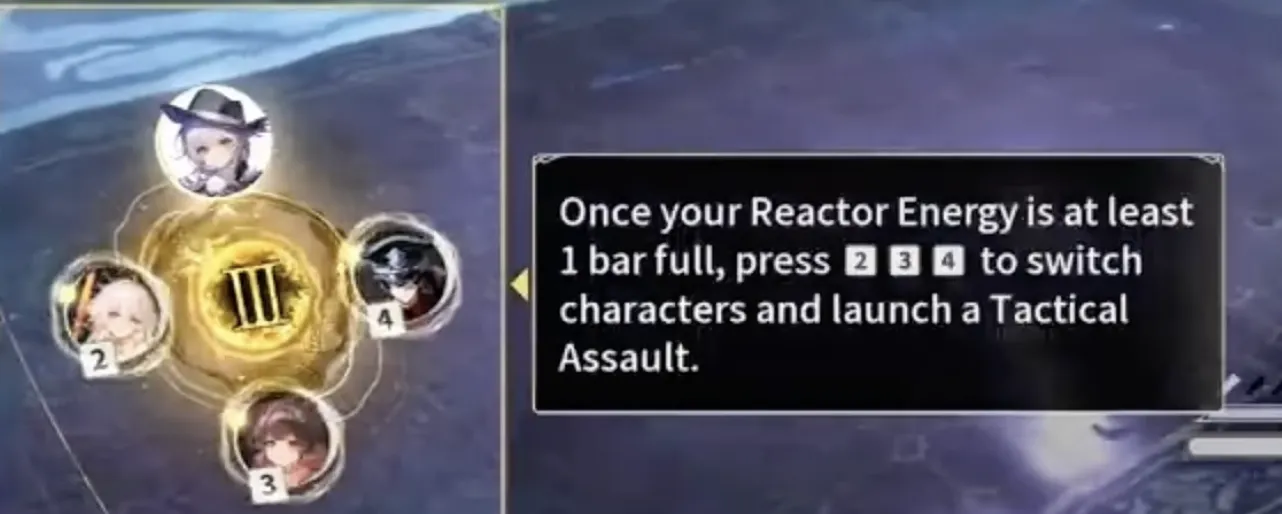
The Dichotomy beta swap prompt over the Reactor Energy ring, from official test footage.
Players coming from other swap-based action games will recognize the shape of this immediately. It sits closer to Zenless Zone Zero's Chain Attack (a shared meter that lets you queue rapid character swaps for a burst window) or Tower of Fantasy's team-synergy gauge than to Wuthering Waves' per-character Forte, which charges independently per unit rather than as a shared pool. Reactor Energy's shared, stackable-to-three design rewards constant rotation over parking on one carry, the same lesson those other games teach.
Separately, each character also carries their own ability gauge, the resource behind the E-key skill, filling independently of Reactor Energy and Silverdrip (a bar seen fully charged at 2,451/2,451 in testing). This gauge is powered by a resource unique to each character rather than a single shared name: Lorin's is Street Smarts, Rex's is Rage, and Firtho's is her own Silverdrip supply, distinct from the shared Silverdrip-boosts-Reactor-Energy mechanic described above. Think of it as the skill-charge layer that sits underneath Reactor Energy rather than a competing system: it fuels the skill button, Reactor Energy fuels the swap.

Catalyst System
Catalysts are the equippable items that define what your Tactical Assault actually does. Each character's Reactor has three Catalyst slots, and filling all three gives you maximum Tactical Assault power. Every Catalyst carries an attribute that triggers during a Tactical Assault, so you choose catalysts that complement your team's needs, and broadly they are either damage-focused or support-focused, and balancing those across your roster is the goal.
The known Catalyst types split into four roles. The table below lays out what each one does and the kinds of effects it brings to a Tactical Assault. For the individual stones, the Catalyst database carries all 17 with their exact effect text and durations.
| Type | What It Does | Examples |
|---|---|---|
| Offense | Increases incoming character's attack damage during Tactical Assault | ATK boost, Crit rate increase |
| Support | Provides party-wide buffs or healing when Tactical Assault triggers | Teamwide heal, Shield boost |
| Defense Shred | Reduces enemy defenses during Tactical Assault, increasing all subsequent damage | DEF reduction, Attribute RES down |
| Attribute | Deals additional Reactor Attribute damage matching the wearer | Ignis fire damage, Glacies ice damage |
One point trips up a lot of new players: Catalysts and Motives are different systems. Catalysts are equippable items for your Reactor that control Tactical Assault behavior, while Motives are equipment items with stats and set bonuses. Both are needed for optimized builds, so do not treat one as a substitute for the other.
Advanced Rotation & Tips
Optimizing your Reactor Energy usage comes down to a repeatable swap pattern. Start with your main DPS, dealing damage and parrying to build Reactor Energy directly while charging Silverdrip on the side to speed that gain up. When you have a bar banked, swap to a support character to launch a Tactical Assault, and let that support use abilities and provide buffs or heals. Swap to your tank or CC character to launch another Tactical Assault, then swap back to your DPS once their ability charge has regenerated. Repeat the cycle, and never let Reactor Energy sit at max without spending it.
A handful of optimization tips keep that rotation efficient. Don't hoard bars: a full Reactor Energy gauge is wasted if you never spend it. Swap during boss vulnerability, timing your Tactical Assault for when the boss is staggered. Match Catalysts to team needs, so if your team lacks healing you equip a support Catalyst on one character. And chain with Execution: an Execution charges Silverdrip, Silverdrip pushes Reactor Energy up faster, and a swap right after fires a Tactical Assault, giving you a double burst window.
All of this rolls up into one complete combat loop: Parry → Stun → Execution → Silverdrip → Reactor Energy → Tactical Assault + Catalyst → Repeat. This loop is the foundation of all optimized Silver Palace combat, and once you internalize it you can clear content far above your level.
Frequently Asked Questions
What is Reactor Energy in Silver Palace?
Reactor Energy is the resource displayed as a Roman-numeral counter (I, II, III) surrounding your Reactor, situated between your HP and Skill bars. It fills from attacking enemies in general, and Silverdrip, built separately from Executions and parries, accelerates how fast it climbs. Once you have at least one bar, you can spend it on a Tactical Assault.
What happened to Silverdrip and Ambush?
Dichotomy beta footage confirms Silverdrip and Ambush are still both in the game, but their relationship changed. Silverdrip is no longer the swap gauge itself: it is a booster that speeds up how quickly Reactor Energy fills. Ambush was renamed on-screen to Tactical Assault, the swap-attack you spend Reactor Energy on.
How does the Tactical Assault system work?
Once your Reactor Energy is at least one bar full, press 2, 3, or 4 to switch characters and launch a Tactical Assault. The incoming character performs a powerful attack and simultaneously activates their Catalyst attribute, dealing Reactor Attribute damage, applying buffs, bolstering shields, or providing healing depending on the equipped Catalyst.
What are Catalysts and how do they work?
Catalysts are equippable items for each character's Reactor (3 slots per character). Each Catalyst has an attribute triggered during Tactical Assaults. Known types include: offense (ATK boost, crit rate), support (teamwide heal, shield boost), defense shred (DEF reduction, Attribute RES down), and attribute (additional Reactor Attribute damage).
How do I maximize Reactor Energy?
Deal consistent damage to enemies for the base fill rate, then stack Executions and parries on top, since both charge Silverdrip and Silverdrip accelerates Reactor Energy gain. Ability charge also regenerates passively off-field, so swap characters frequently to spend their charge, then swap back later when it has recharged.
What is the Catalyst vs Motive difference?
Catalysts are equippable items for your Reactor that define what your Tactical Assault does (damage, heal, buff, etc.). Motives are equipment items with stats and set bonuses that enhance your characters. They serve different purposes: Catalysts control your Tactical Assault behavior, Motives provide raw stats.
Reactor Energy rewards players who stop thinking of it as a meter to fill and start treating it as the rhythm of their whole team. Build it with damage, boost it with Silverdrip from Executions and parries, spend it through well-timed Tactical Assaults, and let each character's Catalyst stack onto the last. From here, the natural next steps are the full Combat Mastery guide for the fight fundamentals underneath this system and the Tier List to see which characters make the loop sing.
